Build a Garden Shed: Expert Tips for Storage & Organisation
Anúncios
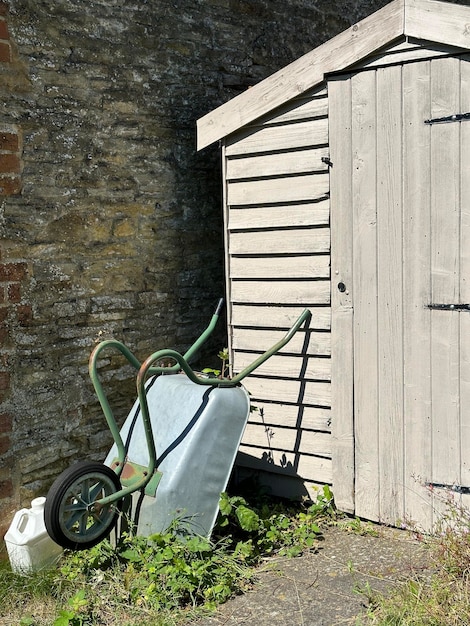
Building a garden shed is a practical solution for creating storage space and organising your garden tools, offering protection from the elements and easy access when needed.
Tired of tripping over your garden tools? Want a dedicated space to store your equipment and supplies? Learning how to build a garden shed can create storage space and organise your garden tools, transforming your outdoor area into a more functional and enjoyable space.
Anúncios
Planning Your Garden Shed Project
Before you even think about hammering a nail, careful planning is essential. This stage lays the groundwork for a successful shed build. Consider these factors to ensure your shed meets your specific needs.
Think about size, location, and potential planning permissions to avoid headaches down the line.
Anúncios
Assessing Your Storage Needs
The first step is determining what you need to store. This dictates the size of your shed. Consider:
- Lawnmowers and other large equipment
- Gardening tools (shovels, rakes, hoes)
- Pots, planters, and gardening supplies
- Outdoor furniture during the off-season
Don’t underestimate; it’s better to have a bit of extra space than to be cramped. A clear understanding of your storage needs will guide you in choosing the right size for your garden shed.
Choosing the Right Location
The location of your shed is just as important as its size. Consider:
- Accessibility from your house and garden
- Ground conditions (level and stable)
- Proximity to trees (roots can cause problems)
- Sunlight (potential for overheating or moisture issues)
Also, check with your local council for any restrictions or regulations around building garden sheds. Understanding these factors ensures that your shed not only fits your storage needs but also is conveniently and safely located.
Obtaining Necessary Planning Permissions
Depending on the size and location of your shed, you might need planning permission. Regulations vary by region, so it’s best to check with your local council. Factors that can influence planning requirements include:
- The size and height of the shed
- Its proximity to property boundaries
- Whether it is visible from the road
Failing to obtain the necessary permissions can result in fines or even having to remove the shed. Taking the time to ensure compliance with local regulations is a crucial step in the planning phase.
In conclusion, the planning phase is a vital component of building a garden shed. Assessing your storage needs, choosing the right location, and obtaining any necessary planning permissions can help make the entire process more seamless. With a well-thought-out plan, you can avoid potential problems, ensuring that your shed meets your needs and enhances your garden.
Selecting the Right Materials
The materials you choose for your shed will impact its durability, appearance, and cost. Wood is a popular choice, but consider whether you’re looking for traditional charm or modern convenience.
Explore the pros and cons of different options to find the best fit for your budget and aesthetic preferences.
Wood vs. Metal vs. Plastic
Each material has its own strengths and weaknesses:
- Wood: Traditional, aesthetically pleasing, customisable, but requires regular maintenance. Building a garden shed with wood offers a classic look but demands more upkeep to prevent rot and insect damage.
- Metal: Durable, low maintenance, but can be susceptible to rust if not properly treated. While offering superior durability, metal sheds may lack the aesthetic appeal of their wooden counterparts.
- Plastic: Affordable, lightweight, weather-resistant, but may not be as sturdy or aesthetically pleasing. These are a budget-friendly and virtually maintenance-free option, but may not possess the strength and visual appeal of wood or metal.
Consider the longevity, cost, and maintenance requirements of each material before making a decision.
Choosing the Right Type of Wood
If you opt for wood, consider these options:
- Cedar: Naturally weather-resistant and aromatic, but more expensive. Its natural resistance to decay and insects makes it an excellent, albeit pricier, choice.
- Pine: Affordable and readily available, but requires treatment to prevent rot and insect damage. While offering a cost-effective solution, pine demands regular treatment to enhance its durability.
- Treated Lumber: Pressure-treated to resist rot and insects, but may contain chemicals. The pressure treatment ensures longevity, but it also introduces potentially harmful chemicals into the environment.
Each type of wood offers a unique balance of cost, durability, and aesthetic appeal. Select the one that best suits your project requirements. The right material will ensure your shed remains both functional and aesthetically pleasing for years to come.
In conclusion, selecting the right materials is crucial for the success and longevity of your garden shed. When choosing, weigh the benefits and drawbacks of wood, metal, and plastic. Once you’ve narrowed down your choices, carefully asses the different types of wood, considering factors such as cost, durability, and environmental impact. By carefully considering these aspects, you’ll be closer to building a sturdy and aesthetically pleasing garden shed.
Building the Foundation
A solid foundation is crucial for the stability and longevity of your shed. Whether you choose a concrete slab, gravel base, or wooden platform, a level and well-prepared base will prevent future problems. Take the time to ensure your foundation is properly built. A stable, correctly built foundation ensures a long-lasting and sturdy structure.
A good foundation will ensure your shed lasts for years to come. Let’s explore the key aspects of building a strong base for your garden shed.
Preparing the Ground
Before laying any foundation material, the ground needs to be prepared. This includes:
- Clearing the area of vegetation and debris
- Levelling the ground with a shovel and spirit level
- Compacting the soil with a tamper or plate compactor
Proper ground preparation ensures a stable base for your foundation, preventing settling or shifting over time.
Choosing Your Foundation Type
There are several foundation options to choose from:
- Concrete Slab: Most durable, but requires more effort and cost.
- Gravel Base: Affordable and provides good drainage, but may require a border to contain the gravel.
- Wooden Platform: Simple to build, but requires pressure-treated lumber to prevent rot.
The type of foundation depends on your budget, skill level, and soil conditions. Consider the climate and potential moisture levels to ensure a long lasting foundation.
Laying the Foundation
The process varies depending on the type of foundation:
- Concrete Slab: Pour concrete into a prepared form and level it with a screed.
- Gravel Base: Spread gravel evenly over the prepared area and compact it.
- Wooden Platform: Build a frame from pressure-treated lumber and fill it with gravel or compacted soil.
Regardless of the method, ensure the foundation is level and properly supported. This ensures the long-term stability of your garden shed. By investing time and effort into building a solid foundation, you’re setting the stage for a durable and functional garden shed.
To sum up, building a durable and stable foundation is essential when building a garden shed. By taking the time to prepare the ground, selecting the appropriate foundation type, and following careful construction guidelines, you’ll be well on your way to creating a shed that withstands the test of time.
Framing the Shed
The frame provides the structural support for your shed. Accuracy is key during this stage. Ensure all your cuts are precise and that the frame is square and plumb. Using the right tools and taking your time is essential. This is the skeleton of your shed and determines its overall strength and stability.
A well-built frame ensures your shed is sturdy and able to withstand the elements.
Cutting the Lumber
Accurate cuts are essential for a strong and square frame. Use a circular saw for straight cuts and a miter saw for angled cuts. Before cutting:
- Measure and mark the lumber accurately.
- Use a speed square to ensure square cuts.
- Wear safety glasses and gloves.
Precise cuts guarantee that the frame will fit together properly and provide the necessary support.
Assembling the Walls
Start by assembling the walls on a flat surface. Typical wall framing includes:
- Top and bottom plates (horizontal)
- Vertical studs (spaced 16 or 24 inches apart)
- Corner studs and bracing for added strength
Secure the lumber together with nails or screws. Ensuring the walls are square before attaching them is critical. Square and sturdy walls are essential for a structurally sound garden shed.
Raising the Walls
With the walls assembled, carefully raise them into position. Use temporary bracing to hold them in place. Then:
- Check that the walls are plumb (vertical) with a level.
- Secure the walls to the foundation with anchor bolts or screws.
- Connect the walls to each other at the corners.
Ensure the walls are properly aligned and securely fastened before proceeding. This process transforms the construction site into a recognisable shape, with the frame ready for the next steps.
In conclusion, the framing stage is a critical step in building a sturdy garden shed. During this phase, precision and care are essential, as they lay the base for a solid and lasting structure. By carefully cutting the lumber, assembling the walls with precision, and raising them securely, you’re setting the stage for building a functional and durable outdoor storage space that will add value to your property for years to come.
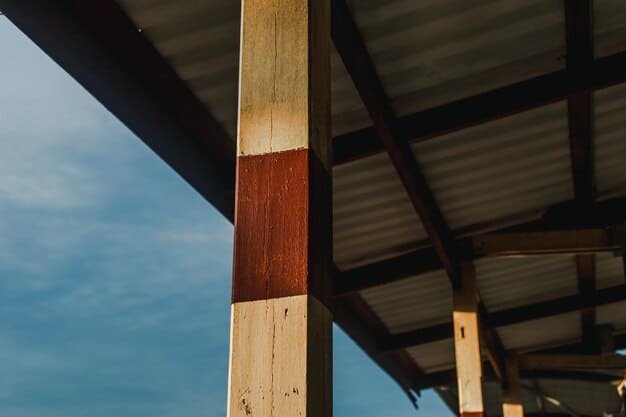
Adding the Roof and Siding
The roof protects your shed from the elements, while the siding gives it its finished look. Choose materials that are durable and weather-resistant. The roof’s angle, the materials it is made of, and the quality of construction all affect how well it protects your shed from the elements. The siding adds charm and protects the frame of the shed.
A well-constructed roof and siding will keep your shed dry and secure.
Installing the Roof
The roof structure typically includes:
- Rafters or trusses (to support the roof)
- Roof sheathing (plywood or OSB)
- Waterproof underlayment (to protect against leaks)
- Roofing material (shingles, metal, or tile)
Ensure the roof is properly ventilated to prevent moisture buildup. A well-installed roof provides essential weather protection for the garden shed.
Choosing the Right Siding
Siding options include:
- Wood siding (clapboard, shiplap, or board and batten)
- Vinyl siding (low maintenance and affordable)
- Metal siding (durable and fire-resistant)
Choose a siding material that complements your home and withstands the local climate. Aesthetics and durability are both important concerns when choosing siding.
Attaching the Siding
Carefully attach the siding to the frame, overlapping each piece to create a waterproof barrier. Ensure proper nailing or screwing to secure the siding. Precise construction techniques prevent water infiltration and increase longevity.
- Start at the bottom and work your way up.
- Use a level to ensure the siding is straight.
- Seal any gaps or cracks with caulk.
A neat and properly installed siding enhances the shed’s appearance while protecting it. By carefully assembling the roof and siding to your garden shed, you can protect it from the elements and achieve its aesthetic look.
In summary, integrating a durable roof and siding is vital for the functionality and aesthetics of your garden shed. From selecting the perfect materials to mindful installation, every detail is key to ensure your shed can resist external elements while matching your personal style.
Adding Doors and Windows
Doors provide access and security, while windows let in natural light. Choose doors and windows that complement the style of your shed and are appropriate for its intended use. Think about how frequent you will be going in and out of the shed and about what kind of light you need for the tasks you will be doing inside.
Properly installed doors and windows enhance the functionality and appeal of your shed.
Selecting Doors and Windows
Consider these factors when choosing doors and windows:
- Size and style (match the shed’s design)
- Material (wood, metal, or vinyl)
- Security features (locks and sturdy frames)
Choose doors and windows that provide both functionality and aesthetic appeal. A well-considered design ensures the optimal balance between natural light and security, enhancing the usability of the shed.
Installing the Door Frame
The door frame should be square and plumb. Make sure it fits snugly within the opening. Then:
- Shim the frame if necessary to ensure it’s level.
- Secure the frame to the wall studs with screws.
- Attach the door hinges to the frame and door.
A properly installed door frame ensures smooth operation and security.
Installing Windows
Windows should also be installed square and level. Follow these steps:
- Caulk around the window frame to prevent drafts and leaks.
- Secure the window frame to the wall studs with screws.
- Add trim to the interior and exterior for a finished look.
Well-installed windows provide natural light and ventilation. Good sealing and secure fitting are important to protect from the elements.
Overall, the strategic addition of doors and windows significantly boosts the utility and charm of your garden storage shed. Make the best decisions according to the space’s needs.
In conclusion, incorporating doors and windows correctly increases both the usefulness and aesthetic feel of your garden shed. By thoughtfully selecting materials, installing frames with accuracy, and securing all elements firmly, one makes sure the shed is both functional and visually appealing. This careful finishing touch completes the construction process and transforms a basic shed into a prized part of the garden space.
Organising Your Garden Shed
Once your shed is built, it’s time to organize it. Maximize space with shelves, hooks, and storage containers. Creating a systematic layout ensures that everything is easily accessible. This transforms your new structure into an organized and efficient space.
A well-organized shed makes gardening tasks easier and more enjoyable, and ensures the tools are safe and well maintained.
Shelving Solutions
Shelves are essential for storing smaller items. Consider:
- Adjustable shelves (to accommodate different sized items)
- Heavy-duty shelves (for storing heavy items)
- Wall-mounted shelves (to save floor space)
Strategic shelving optimizes vertical space and keeps items organized and accessible. A functional shelving system contributes significantly to an organised garden shed. Consider installing wall-mounted shelves to conserve floor space.
Hooks and Hangers
Hooks and hangers are great for storing tools and equipment. Use them for:
- Hanging shovels, rakes, and hoes
- Storing hoses and cords
- Organising hand tools
Hooks and hangers keep tools off the floor and within easy reach. This maximizes the storage capacity of the shed and helps you keep your tools well organised.
Storage Containers
Use storage containers to keep smaller items organized. Options include:
- Plastic bins (for storing soil, fertilizer, and seeds)
- Clear containers (so you can see what’s inside)
- Stackable containers (to maximize space)
Label each container to easily identify its contents. Storage containers will help you keep your items easily accessible and well organised.
All in all, maximising the arrangement of your garden shed with shelves, hangers, and boxes turns the shed into a space where everything has its place. It increases the convenience and enjoyment of your backyard activities.
In conclusion, putting effort into the organisation of your garden shed ensures all your gardening essentials are stored efficiently, safely, and are readily accessible. Through using clever storage solutions, the shed turns into more than just a storage space, but a fully functional area that supports your gardening ventures. This leads to an improved gardening experience.
| Key Point | Brief Description |
|---|---|
| 📏 Planning & Preparation | Assess storage needs, choose location, and check permissions before building. |
| 🔨 Material Selection | Consider wood, metal, or plastic based on durability, maintenance, and cost. |
| 🏗️ Foundation Importance | A solid foundation ensures shed stability and longevity. Choose concrete, gravel, or wood. |
| 🧽 Organisation Tips | Use shelves, hooks, and containers to efficiently store and access garden tools. |
Frequently Asked Questions
▼
In many cases, small garden sheds do not require planning permission, especially if they are within certain size and height limits. However, it’s essential to check with your local council to confirm specific regulations in your area.
▼
The best material for a garden shed foundation depends on your budget and soil conditions. Concrete slabs and gravel bases are good options, providing reliable support and drainage if installed properly.
▼
To ensure your garden shed is durable, start wth a solid foundation. Choose weather-resistant and high-quality materials, and regularly maintain by sealing any gaps or cracks; this will help your shed last for many years.
▼
For small garden sheds, try using vertical shelving, hooks, and stackable containers to maximise space. Wall-mounted tool racks and overhead storage can also help keep items organised and accessible. These help keep the most important items easily accessible.
▼
It’s recommended to conduct a thorough inspection and maintenance check at least once a year, preferably in the spring. Regularly clean the shed, inspect any damage, and reapply waterproof coatings to protect your garden shed.
Conclusion
Building a garden shed provides an efficient way to create storage space and organise your garden tools, enhancing both the functionality and aesthetic appeal of your outdoor area. By carefully planning, selecting the right materials, and following best practices for construction and organisation, you can create a durable and practical space that meets your gardening needs for years to come.


